My first goal was to call the company and try and get a free sample. I tried every trick I had in the book, including pulling out the Architect cred, citing my houseblog, etc. I'm not sure how these other housebloggers get free stuff, but I'd think between the blog and the constant specification of materials for my projects, I'd get a little love. Not so much. But everybody's got to make a buck, so I decided to bite the bullet and just buy some... I got the "Two Pack" size kit . (Not to be confused with the Tupac sized kit, which is largely overrated and is likely to induce gang warfare.) It was $63 bucks, which I hoped was worth it as it was only listed as being for 6 linear feet of crack, though I generally believe those numbers are stretchable.

 Instructions and photos below are from Big Wally himself. Parenthetical references below indicate my experiential musings which relate, albeit loosely.
 Step #1:
Find a crack.
(Check. I had several.)
 Step #2:
Using a 3/16" bit drill holes along length of crack, 6-8" O.C. min., being careful to go only through the plaster and not into the lathe.
(Not a problem. Marked my bit with a piece of electrical tape once I had established the proper depth.)
 Step #3:
Vaccum out any loose debris.
(Not inlcuded on the printed directions, only on the website. But no biggie. Due to my lack of a shopvac I did use our regular carpet vaccum. Shhh... don't tell.)
 Step #4:
Spray one squeeze of proprietary conditioner in each hole, wait 10 minutes for curing.
(It did seem that for $63, they could have invented a more unique tool/fitting for getting the spray into the hole. Some sort of specialized nozzle or adaptor. But it worked, so not really much of a complaint.)
 Step #5:
Inject proprietary adhesive into conditioned holes. Use about 1/2 to one squeeze of caulk gun per hole.
(This is where things got interesting.
a. I think 1/2 of a squeeze is more than enough, unless your plaster is visibly falling off the wall and the gap between the plaster and the lathe is substantial. See Notes 2 and 3.
b. One time, I was at the zoo with a friend. We went to see the big cats (lions and tigers and bobcats oh my) have their daily feeding in the cat house. It was very cool to watch them pace along the front of the cage and growl as zookeepers dropped a Porterhouse of Unimaginable Size into their cage. As we left, one of the excited and now very territorial cats exited through his "kitty door" to a small outdoor cage by the entrance. A young boy, maybe 8 or 9 years, approached the cage to watch the cat pace and growl. The cat responded to this little boy's encroachment by turning 180 degrees, lifting his tail, and marking his territory in a horizontal trajectory "Old Faithful" sized plume of urine, pheremones, and whatever other bodily fluids are part of your standard Puma olfactory graffiti tagging. The boy was saturated. He turned and began to cry. My friend and I laughed and walked away toward the monkey house to see if we could get a live re-enactment of that video of the monkey scratching its butt.
c. In many ways, the adhesive injection process was kind of like that. The first couple of times that adhesive came shooting backwards at me, I assumed that either I had over-injected or that I had misaligned the nozzle with the hole. But upon further experiments, I discovered that the adhesive was often shooting out of other holes or out of the crack itself. This led me to believe that in conditions where the lathe and plaster where just barely delaminated or not delaminated at all, (which you can't predict for each individual application hole), the adhesive was traveling behind the plaster and there was not enough cavity volume to accept the injection. Either that or the wall was marking IT's territory. Or the wall was very pleased to see me. Either way, the moral of the story here is definitely wear eye protection and clothes you don't care about losing. On to Step #6!...)
 Step #6:
Wipe off excess adhesive.
(Again, not listed in the printed directions, but relatively obvious. If I were to revise the printed directions, I would probably include a note that one should wipe adhesive from the wall and then go take a shower due to previous incidents in Step #5.)
 Step #7:
Clamp the wall or ceiling temporarily with screws and 2” plastic washers—bring the plaster gently back to its original plane. Allow to cure for 24 to 48 hours.
(Anyone who's ever tried to nail into a lathed surface behind a plaster wall is familiar with that bouncing sensation that means your hammer is flexing the individual lathe and your nail not finding purchase. That was a minor issue here.)
Step# 7.2
None listed.
(What? No 7.2? In addition to this being the requisite beer/cigar break time, the printed directions should probably also mention that after clamping, additional adhesive will slowly seep from the holes. And while the directions say that dried adhesive can be removed with a putty knife, I can tell you that said scraping can do quite a bit of damage, pulling little chunks of plaster away with it. Another cleaning after the clamps sit for a few minutes, or the length of the aforementioned cigar/beer, would minimize this impact.)
 Step #8:
Carefully remove clamps and fill holes with joint compound.
(Again, as I said above, get the glue off the wall first. It does not sand down well. Additionally, you may want to save those clamps for future use. More on that later.)
 Step #9:
Sand, prep, and paint.
(Check. Check. And Check.)
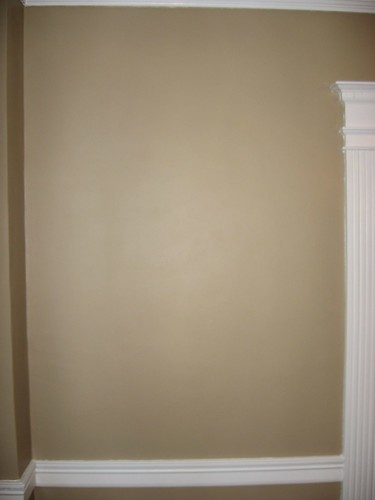
The end verdict is basically positive. Big Wally really secured all of the cracks quite well. If you get up close to the wall, one can see some divits from the glue application holes which would have been minimized by a more thorough cleaning instruction, but not too shabby from a few feet back. (There was a crack running from the top of the door lintel on the right down to the inside corner at bottom left, just above the chair rail.)
The price seemed high, although I think I could have stretched it if not for the spontaneous adhesive eruptions. Although, Wally, you should really consider selling the adhesive tubes alone, since I now have a bevy of clamps and conditioner for future projects but the adhesive went fast. As a result, I'll probably give some standard construction adhesive a shot before ordering another Tupac kit.